
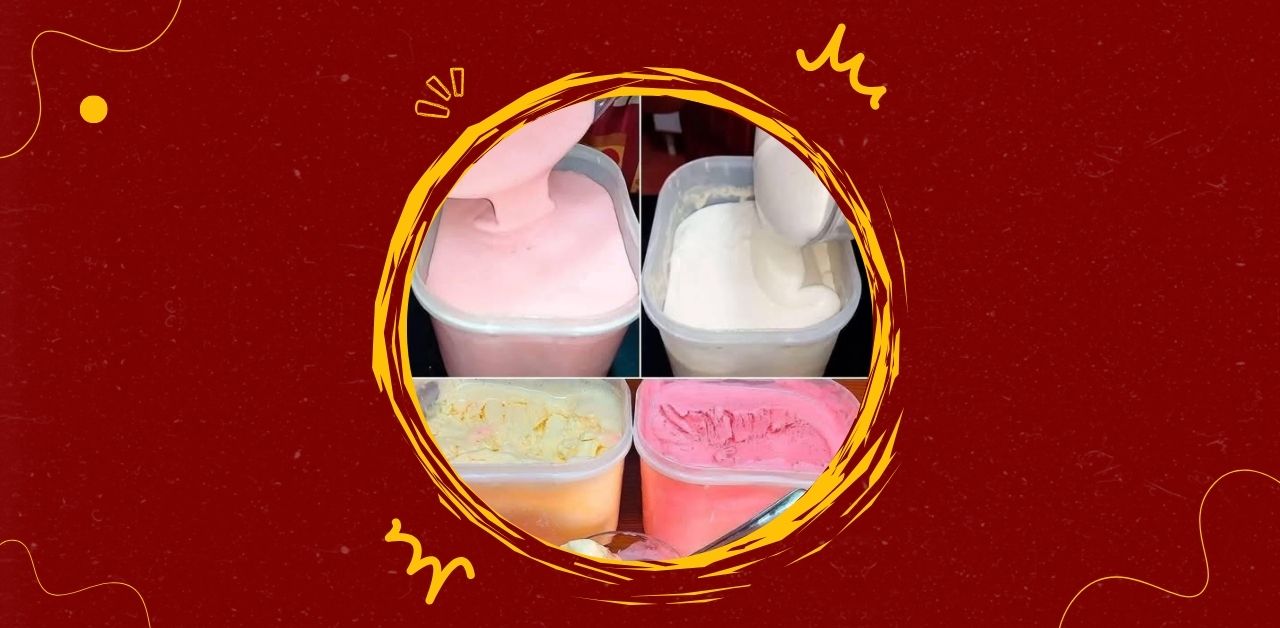
Swirled & Creamy Homemade Ice Cream Delight is a no-churn frozen dessert that combines the simplicity of home preparation with the indulgence of creamy, flavorful ice cream. Made without an ice cream machine, this recipe uses whipped cream and condensed milk as its base, allowing for a smooth, scoopable texture that rivals store-bought varieties. The visual appeal comes from the dual-tone presentation—one container featuring a solid pink flavor and the other showcasing a playful swirl of yellow and pink, creating a feast for both the eyes and the palate.
This ice cream is ideal for warm afternoons, festive gatherings, or quiet moments of indulgence. It’s easy to customize with fruit purees, flavor extracts, or natural colorings. The pink hue can be achieved using strawberry, raspberry, or rose syrup, while the yellow swirl may come from mango puree, vanilla custard, or saffron milk. The result is a creamy, colorful dessert that’s rich, refreshing, and deeply satisfying.
Whether served in scoops, cones, or layered in parfaits, this ice cream offers a joyful experience for all ages. It’s beginner-friendly, freezer-stable, and endlessly adaptable—perfect for creative cooks and dessert lovers alike.
INGREDIENTS:
Base mixture:
- 2 cups heavy whipping cream (chilled)
- 1 can (400g) sweetened condensed milk
- 1 teaspoon vanilla extract
For pink flavor:
- 2 tablespoons strawberry puree or rose syrup
- Optional: a few drops of pink food coloring
For yellow flavor:
- 2 tablespoons mango puree or vanilla custard
- Optional: a pinch of saffron soaked in warm milk or a few drops of yellow food coloring
Equipment:
- Electric mixer or whisk
- Mixing bowls
- Spatula
- Two freezer-safe containers with lids
- Spoon or skewer for swirling
- Freezer space for setting
INSTRUCTION:
Step 1: Prepare the base
- Chill the mixing bowl and beaters in the freezer for 10 minutes before starting.
- Pour the heavy cream into the chilled bowl.
- Using an electric mixer, beat the cream on medium-high speed until stiff peaks form. This takes 3–5 minutes.
- In a separate bowl, mix condensed milk with vanilla extract until smooth.
- Gently fold the whipped cream into the condensed milk mixture using a spatula.
- Mix until fully combined, forming a thick, creamy base.
Step 2: Divide and flavor
- Divide the base mixture evenly into two bowls.
- In one bowl, add strawberry puree or rose syrup. Mix gently until the color and flavor are evenly distributed.
- Add pink food coloring if desired for a more vibrant hue.
- In the second bowl, add mango puree or vanilla custard. Mix gently.
- Add yellow food coloring or saffron milk for enhanced color and aroma.
Step 3: Pour and swirl
For solid pink ice cream:
- Pour the pink mixture into one container.
- Smooth the top with a spatula.
- Cover with lid or cling film and set aside.
For swirled ice cream:
- Pour half of the yellow mixture into the second container.
- Add spoonfuls of the pink mixture on top.
- Pour the remaining yellow mixture over the pink.
- Use a skewer or spoon to gently swirl the colors together. Avoid overmixing to preserve the marbled effect.
- Smooth the top and cover.
Step 4: Freeze
- Place both containers in the freezer.
- Freeze for at least 6 hours, preferably overnight, until fully set.
- For best texture, avoid stirring during freezing.
Step 5: Serve
- Remove containers from freezer and let sit at room temperature for 5 minutes.
- Scoop using a warm spoon or ice cream scoop.
- Serve in bowls, cones, or with fruit toppings.
- Enjoy immediately or return unused portions to the freezer.
SERVINGS:
This recipe yields approximately 10–12 scoops, suitable for 5 to 6 servings depending on portion size. For larger gatherings, double the recipe and use wider containers.
NOTE:
Ingredient Tips
- Cream: Use full-fat whipping cream for best texture. Avoid low-fat or non-dairy cream unless specifically formulated for whipping.
- Condensed milk: Adds sweetness and creaminess. No additional sugar is needed.
- Flavoring: Use natural fruit purees for authentic taste. Syrups offer convenience and vibrant color.
- Coloring: Optional—natural colors from fruit are often sufficient. Food coloring enhances visual appeal.
Mixing Tips
- Whipping cream: Chill thoroughly before whipping. Overbeating can cause curdling.
- Folding: Use gentle motions to preserve airiness. Avoid vigorous stirring.
- Swirling: Use a light hand to create marbled patterns. Overmixing blends colors completely.
Freezing Tips
- Containers: Use shallow, wide containers for faster freezing and easier scooping.
- Covering: Prevent ice crystals by sealing tightly.
- Setting time: Minimum 6 hours; overnight yields best results.
- Texture: No-churn ice cream may soften slightly faster than churned varieties.
Serving Suggestions
- With toppings: Add chopped nuts, chocolate chips, or fruit compote.
- In cones: Scoop into waffle or sugar cones for classic presentation.
- Layered dessert: Use in parfaits or ice cream sandwiches.
- Festive twist: Add sprinkles or edible glitter for celebrations.
Storage and Shelf Life
- Freezer: Store in airtight containers for up to 2 weeks.
- Avoid refreezing: Once softened, do not refreeze to preserve texture.
- Labeling: Mark containers with flavor and date for easy access.
Customization Ideas
- Nutty version: Add crushed pistachios or almonds to the base.
- Chocolate swirl: Mix cocoa powder into one portion for a chocolate-pink combo.
- Tropical twist: Use pineapple or coconut puree for exotic flavors.
- Spiced version: Add cardamom, cinnamon, or nutmeg for warmth.
Practical Tips
- Batch prep: Make multiple flavors and store in labeled containers.
- Portion control: Use small scoops for tasting platters.
- Presentation: Serve in glass bowls or on decorative trays.
- Garnish: Top with mint leaves, fruit slices, or drizzle of syrup.
Mindful Enjoyment
- Sensory cues: Notice the color, aroma, and texture as you scoop and taste.
- Relaxation: Making ice cream is a joyful ritual—enjoy each step.
- Sharing joy: Perfect for family treats or gifting—serve with warmth and creativity.
- Creative expression: Customize flavors, colors, and presentation to reflect your style.
- Seasonal twist: Use seasonal fruits for fresh variations.
- Cultural connection: Homemade ice cream is a universal delight—celebrate its versatility and heritage.