
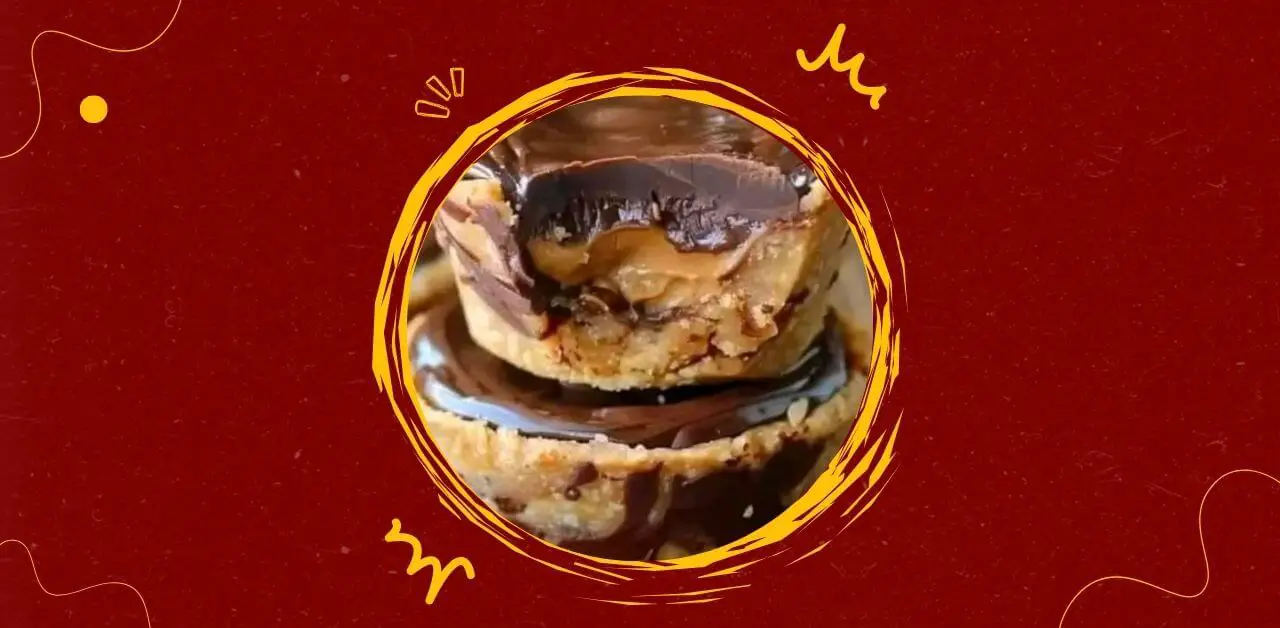
Chocolate Peanut Butter Cookie Cups are a rich, indulgent dessert that combines the comforting texture of a chocolate chip cookie base with the creamy decadence of peanut butter and the smooth finish of melted chocolate. These layered treats are baked in muffin tins to create a cup-like structure that holds the luscious fillings. The cookie base is soft yet sturdy, speckled with chocolate chips and golden brown around the edges. Inside, a generous layer of peanut butter adds salty-sweet contrast, while the chocolate topping seals the cup with a glossy, velvety finish. Perfect for parties, gifting, or satisfying a personal craving, these cookie cups are a celebration of texture and flavor in every bite.
INGREDIENTS:
For the cookie base:
- 1½ cups all-purpose flour
- ½ teaspoon baking soda
- ¼ teaspoon salt
- ½ cup unsalted butter, softened
- ½ cup brown sugar
- ¼ cup granulated sugar
- 1 large egg
- 1 teaspoon vanilla extract
- ¾ cup semi-sweet chocolate chips
For the peanut butter filling:
- ¾ cup creamy peanut butter
- 2 tablespoons powdered sugar
- 1 tablespoon butter, softened
- ½ teaspoon vanilla extract
For the chocolate topping:
- 1 cup semi-sweet chocolate chips
- ¼ cup heavy cream
- 1 tablespoon butter (optional, for extra shine)
INSTRUCTION:
Step 1: Prepare the Cookie Dough
- Preheat your oven to 350°F (175°C). Line a standard muffin tin with paper liners or lightly grease each cup.
- In a medium bowl, whisk together flour, baking soda, and salt. Set aside.
- In a large mixing bowl, cream together softened butter, brown sugar, and granulated sugar until light and fluffy.
- Beat in the egg and vanilla extract until fully incorporated.
- Gradually add the dry ingredients to the wet mixture, stirring until just combined.
- Fold in the chocolate chips. The dough should be soft but not sticky.
Step 2: Form the Cookie Cups
- Scoop about 2 tablespoons of cookie dough into each muffin cup.
- Press the dough gently into the bottom and slightly up the sides to form a shallow cup.
- Bake for 10–12 minutes, or until the edges are golden and the centers are set.
- Remove from oven and immediately use a spoon or small cup to press down the center of each cookie to reinforce the cup shape.
- Let cool in the pan for 10 minutes, then transfer to a wire rack to cool completely.
Step 3: Make the Peanut Butter Filling
- In a small bowl, mix peanut butter, powdered sugar, butter, and vanilla extract until smooth and creamy.
- Once the cookie cups are cool, spoon or pipe about 1 tablespoon of peanut butter filling into the center of each cup.
- Smooth the top with the back of a spoon or leave it slightly domed for texture.
Step 4: Prepare the Chocolate Topping
- In a heatproof bowl, combine chocolate chips and heavy cream.
- Microwave in 20-second intervals, stirring between each, until the chocolate is melted and the mixture is smooth.
- Stir in butter if using for added gloss.
- Spoon or pour the melted chocolate over the peanut butter layer in each cookie cup.
- Tap the tray gently to level the chocolate and remove air bubbles.
Step 5: Chill and Set
- Place the cookie cups in the refrigerator for 30–45 minutes to allow the chocolate to set.
- Once firm, remove and serve. These cups can be enjoyed chilled or at room temperature.
SERVINGS:
This recipe yields 12 cookie cups. Each cup is rich and satisfying, making it ideal for individual servings. For smaller portions, use a mini muffin tin and adjust baking time to 8–10 minutes.
NOTE:
- Cookie Base Tips:
- Do not overbake the cookie layer; it should remain soft in the center to contrast with the firmer chocolate top.
- Pressing the center down after baking helps create a well for the fillings and prevents overflow.
- Peanut Butter Filling Variations:
- Use crunchy peanut butter for added texture.
- For a sweeter filling, increase powdered sugar slightly.
- Almond butter or sunflower seed butter can be substituted for dietary preferences.
- Chocolate Topping Adjustments:
- Dark chocolate offers a more intense flavor, while milk chocolate adds sweetness.
- Add a pinch of sea salt to the chocolate layer for a gourmet touch.
- For a firmer top, reduce cream slightly or chill longer.
- Storage:
- Store in an airtight container at room temperature for up to 3 days.
- Refrigerate for up to 1 week. Allow to come to room temperature before serving for best texture.
- Freeze for up to 1 month. Thaw in the fridge overnight.
- Presentation Ideas:
- Garnish with crushed peanuts, chocolate shavings, or a drizzle of caramel.
- Serve on a dessert platter with fresh berries or whipped cream.
- Wrap individually for gifting or party favors.
- Allergy Notes:
- Contains gluten, dairy, and peanuts. For gluten-free, use a 1:1 gluten-free flour blend.
- For dairy-free, substitute butter and cream with plant-based alternatives.
- For nut-free, use seed butter and ensure chocolate is allergen-safe.
- Flavor Enhancements:
- Add a dash of cinnamon or espresso powder to the cookie dough for depth.
- Mix a few mini marshmallows into the peanut butter layer for a playful twist.
- Stir in crushed pretzels or graham crackers for crunch.
- Texture Balance:
- The cookie base provides structure, the peanut butter adds creaminess, and the chocolate seals the cup with a smooth finish.
- Each layer should complement the others without overpowering—adjust ratios to suit your taste.
- Serving Occasions:
- Ideal for birthdays, bake sales, holiday trays, or cozy nights in.
- Great for kids and adults alike—easy to hold, no utensils required.
- Pair with coffee, milk, or a dessert wine for a complete experience.
- Batch Scaling:
- Double the recipe for larger gatherings.
- Use multiple muffin tins or bake in batches.
- Prepare cookie bases ahead and freeze; fill and top when ready to serve.
- Mindful Indulgence:
- These cups are rich and satisfying—enjoy in moderation.
- Share with friends or savor slowly to appreciate each layer.
- They’re a reminder that homemade treats can be both simple and spectacular.